
Dam Battlegrounds supply drop locations: full route guide
Every match in Dam Battlegrounds turns on a few loud loot moments, and the supply drop is the loudest of them. A cargo plane crosses the map, a red beacon lights the sky, and the squads inside that 300-meter ring have about ten seconds to decide whether to rotate, hold, or pass. Players who treat drops as random events lose them. Players who memorize the patterns of dam battlegrounds supply drop locations build rotations around them and start winning more of those fights than they lose.
This guide walks through the verified spawn pads, the timing windows the game uses to place drops, the risk profile of each pad, and the rotation logic that turns a contested drop into a controlled play. Examples are drawn from the standard Battle Royale mode on the public test branch, so pad positions and loot tables can shift when the developers rebalance the map.
How supply drops work in Dam Battlegrounds
Supply drops are airdropped cargo crates that contain a curated set of weapons, attachments, healing items, and the occasional cosmetic token. They are not random: each drop follows a fixed flight path, and the release point along that path is drawn from a weighted pool of candidate pads. Learning the system is the first step toward owning the pads.
The flight path and the timing window
A single cargo plane enters the map from a randomized edge once the second safe-zone countdown begins. The plane crosses the playable area on a roughly straight line, releasing one crate roughly every 90 seconds. The flight path is selected from three predefined corridors (north, central, south), and within each corridor the release point is chosen from a pool of candidate pads. Every player on the server sees a red vertical beacon, hears the plane audio cue, and gets a map ping.
The beacon stays lit for about 15 seconds before the crate lands, and the crate remains accessible for the rest of the match unless the zone swallows it. A team that hears the plane has 30 to 45 seconds to decide whether to commit. Outside the high-value ring, the right call is almost always to keep the current rotation.
What is inside a supply crate
Supply drops contain four to six items drawn from a fixed pool. The pool is identical across drops, but the specific combination varies. A typical crate delivers:
- One high-tier weapon such as a sniper rifle, designated marksman rifle, or explosive launcher
- Two to three uncommon or rare attachments
- One epic or legendary healing item
- One throwable or utility piece such as a smoke grenade, EMP, or recon drone
- A small chance of a cosmetic crate token
The combination is the real value. A squad that loots a drop should walk away with an upgraded weapon slot, topped-up sustain, and a piece of utility they could not have found in standard ground loot. Treat the crate as a power spike, not a jackpot.
Why drops are so heavily contested
Two factors make supply drops the most dangerous loot in Dam Battlegrounds. First, the beacon and the map ping alert every player on the map, so the crate pulls third parties by default. Second, the candidate pads cluster near the middle of the map, in zones that are already valuable. Walking to a drop is rarely a free action; it is a fight waiting to happen.
Map layout and the three flight corridors
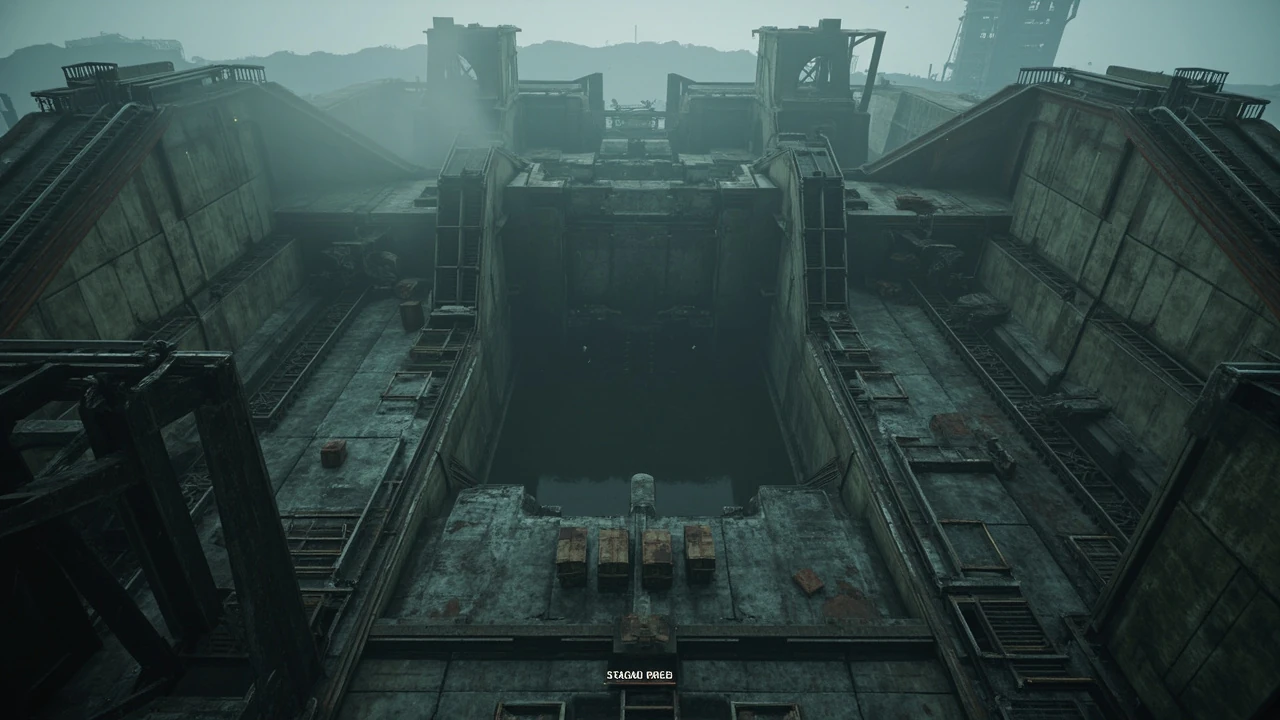
Dam Battlegrounds is built around the central reservoir and the hydroelectric facility that gives the map its name. The playable area is roughly 4 by 4 kilometers, split into a northern industrial zone, a central dam complex, and a southern residential ridge. The supply drop plane always crosses one of three corridors, and each corridor has its own set of candidate pads.
The northern industrial corridor
The northern corridor runs from the cargo rail yard in the northwest to the water treatment plant in the northeast. It is the most built-up corridor, packed with warehouses, container yards, and elevated walkways. The plane typically enters from the west and exits east, releasing a crate somewhere between the rail yard and the water plant. Expect dense cover and dense ambush points.
The central dam corridor
The central corridor crosses the dam crest, the spillway towers, and the lower turbine hall. It is the most exposed corridor in the early game because the dam crest is a long sightline, but it is also the corridor most players associate with supply drops because the dam is the visual identity of the map. A crate on the dam crest is the most visible drop in the game; a crate in the turbine hall is the most defensible.
The southern residential corridor
The southern corridor runs from the lakeside trailer park in the southwest to the hillside suburb in the southeast. The terrain rolls here, with houses, gardens, and small alleys. Drops in this corridor are easier to loot quickly because ground-level cover is dense, but they are also easier to disengage from because the residential streets offer many escape routes.
Every dam battlegrounds supply drop location, ranked by risk
The table below lists the candidate pads observed on the public test branch, grouped by corridor and ranked by contest risk. Risk is an editorial assessment based on cover density, sightline exposure, and the number of nearby rotation paths, not an official metric.
| Location | Corridor | Surface | Risk tier | Best defender strategy |
|---|---|---|---|---|
| Dam crest, center spire | Central | Open concrete | Extreme | Do not contest without smoke; use the side stairwells for cover |
| Spillway tower roof | Central | Elevated metal | High | Land via helicopter or zip line; hold the roof with a sniper |
| Lower turbine hall | Central | Industrial interior | Medium | Take the hall through the east maintenance tunnel; loot and rotate down the river |
| Cargo rail yard, container row C | Northern | Container maze | High | Approach from the south fence; use containers as bullet breaks |
| Water treatment plant, clarifier deck | Northern | Open metal grating | High | Cross only with a smoke grenade; bail out via the east service ladder |
| Warehouse 7 loading bay | Northern | Covered concrete | Medium | Drop from the second floor catwalk; close the roller door behind you |
| Substation switchyard | Northern | Low fence grid | Medium | Take cover behind the transformer banks; watch the west perimeter |
| Trailer park, central loop | Southern | Open gravel | High | Use the trailers as hard cover; expect third parties from the lakeside |
| Hillside suburb, cul-de-sac | Southern | Paved residential | Medium | Take the high ground on the corner house second floor; loot through the garage |
| Lakeside boathouse dock | Southern | Wooden pier | Low | Approach through the boathouse interior; escape into the water if pressured |
The risk tier reflects the typical early-game contest. A crate that lands in a low-risk pad in the late game becomes a high-risk contest because the zone compresses players toward it. Plan for the early-game case and adapt as the circle shrinks.
The contest pressure around each pad also depends on loadout. A squad running shotguns will gravitate toward the trailer park central loop because the close-range fights favor the trailer maze. A squad running marksman rifles will gravitate toward the dam crest and the spillway tower because the sightlines favor long-range duels. Reading the enemy composition through the kill feed, then choosing the pad that matches your own loadout, is the rotation that most squads miss.
Rotation logic: when to take the drop and when to leave it
Chasing a supply drop is a rotation decision, and like every rotation in Dam Battlegrounds, it is a cost-benefit question. The cost is the time spent out of cover, the attention drawn, and the fight that may follow. The benefit is the loot inside the crate and the information gained about where other squads are moving. The right answer depends on the squad’s current loadout, position relative to the next safe zone, and the state of the circle.
The three questions to ask before rotating
Before committing to a supply drop, run through this checklist in order. If any answer is no, the right play is to keep the current rotation and ignore the drop.
- Are we already inside the next safe zone, or can we reach our current rotation target before the crate lands?
- Do we have a healing item and at least one mid-to-long-range weapon between the three of us?
- Can we reach the crate from a direction that does not cross an open sightline?
If the answer to all three is yes, the rotation is sound. If any answer is no, the rotation is a gamble, and gambles in the early game are how squads bleed resources they cannot replace.
When to ignore the drop
Three situations make the correct play a pass. First, the squad is already inside the next safe zone and the drop is outside; the rotation cost is too high. Second, the squad is low on healing items and the pad is in an open area; the third-party risk is too high. Third, the plane is still in the air and the drop corridor is on the opposite end of the map; there is not enough time to make the rotation before the next circle closes.
When to commit to the drop
The drop is worth taking when the squad is between two zones and the drop corridor matches the current rotation. In that case, the drop accelerates the rotation: loot, information, and a stronger position for the next fight. The drop is also worth taking in the late game, when the circle has compressed the map to the point that ignoring the drop means the next squad to loot it will outgun the squad in the final fight.
Approach and contest strategies for each risk tier
Different pads call for different approach patterns. The right pattern depends on the cover density around the landing pad, the number of entry points, and the time available before other squads arrive.
Extreme-risk drops: the dam crest
The dam crest is the most visible pad on the map and the one inexperienced squads chase the most. The crest is a long concrete strip with almost no cover, and any squad on the spillway towers or the control house sees the moment a player steps onto it. The only safe approach is to bring a smoke grenade, smoke the crate, and loot under cover. Even then, expect a third party from the turbine hall or the side stairwells.
If the dam crest must be contested, the best pattern is to split the squad: one player smokes the crate, one holds the west stairwell, and one holds the east stairwell. The holders do not loot until the smoker confirms the crate is safe. If the crate is hot, the holders provide crossfire while the smoker disengages. Stacking the squad on the crate is the most common cause of losing the dam crest.
High-risk drops: the spillway tower and the container row
Spillway tower drops reward players with a height advantage but punish them with a long climb. The tower has one ladder on the east face and one internal stairwell on the west face. A squad that arrives first should take the west stairwell, close the door, and hold the roof with one player while the other two loot. The east ladder is a kill zone while contested.
The container row in the cargo rail yard is a maze of metal walls. The right approach is from the south fence, where a gap in the containers provides cover all the way to the crate. The wrong approach is from the rail line, which is an open sightline for snipers on the warehouse roof. If gunfire breaks out inside the row, do not push through the maze: circle around to the north service road and catch the contesting squad from behind.
Medium-risk drops: the turbine hall, the warehouse, and the cul-de-sac
Medium-risk pads are the most consistent source of free loot for disciplined squads. The turbine hall, warehouse 7, and the hillside cul-de-sac all share a feature: a single dominant entry point that the first squad to arrive can lock down. The pattern is the same in all three. One player holds the entry, one loots, and one watches the secondary exit. The holder does not loot until the looter confirms the crate is safe.
The secondary exit is the most common place to get flanked. In the turbine hall, the secondary exit is the maintenance tunnel that leads to the river. In warehouse 7, the secondary exit is the rooftop access ladder. In the cul-de-sac, the secondary exit is the alley that connects to the next street. Post the third player on the secondary exit before the crate lands.
Low-risk drops: the boathouse dock
The boathouse dock is the safest supply drop pad on the map and a natural landing spot for squads rebuilding after a lost fight. The dock is small, the crate lands in a predictable spot, and the water provides an escape route if a third party arrives. The approach is through the boathouse interior, which has a door on the land side and a door on the water side. Close the land-side door, loot the crate, and exit through the water-side door if pressured. For broader context on the wider game, the ARC Raiders entry on Wikipedia covers the surrounding extraction-shooter design that this map sits inside.
The dock is low risk in the early game and medium risk in the late game. In the late game, the zone often shrinks past the dock, and a crate that lands in the water becomes a contest for the squad about to be pushed out of the circle. Plan accordingly.
Counterplay: how to deny a supply drop to another squad
Not every squad wants to loot the crate. Some squads want to deny the crate to the squad that does, and denial is a viable strategy in Dam Battlegrounds, especially in the late game when the zone is small.
Sniping the crate from a distance
The simplest denial strategy is to position a sniper within range of a likely landing pad and shoot any player who tries to loot it. This works best against the dam crest and the spillway tower, both of which are visible from the control house and the hillside suburb. A coordinated squad can lock down a pad from 200 meters away without crossing the open ground.
Third-party pressure
The third-party strategy is to wait until a squad has committed to a drop, then push them while they are looting. The third-party squad arrives from a flank the looters are not watching, and the fight starts while the looters are still sorting their inventory. This is most effective in medium-risk pads where the looters are focused on the crate and not on the secondary exit.
Zone compression
The zone itself is a denial tool. If the next circle is going to swallow a pad, the right play is often to let the zone do the work. Hold the edge of the next safe zone, watch the drop, and let the zone push the contesting squad out of cover. By the time the zone has moved, the crate is usually gone or the contesting squad is too low on resources to fight back.
Common mistakes players make around supply drops
Even experienced squads repeat the same handful of mistakes when chasing supply drops. The mistakes are not about mechanical skill; they are about decision-making under time pressure. Avoiding them is more valuable than any aim improvement.
Pushing without a smoke grenade
The most common mistake is pushing an open pad without a smoke grenade. A smoke grenade costs one inventory slot and provides roughly 15 seconds of cover. Without it, the squad is crossing an open sightline in front of every other squad in the area. Bring a smoke grenade to every drop contest, or do not contest the drop.
Stacking the squad on the crate
The second most common mistake is stacking all three players on the crate at the same time. Stacking turns a contested drop into a wipe: one grenade, one sniper round, or one well-placed spray deletes the entire squad. The fix is to assign roles before the crate lands: one looter, two holders. The holders do not move until the looter confirms the crate is safe.
Forgetting the secondary exit
The third most common mistake is ignoring the secondary exit. Every pad has a primary entry and a secondary entry. Players remember the primary entry because it is the obvious approach, and they forget the secondary entry because it is the less obvious approach. The squad that uses the secondary entry wins the fight.
Looting in the open after the crate
The fourth most common mistake is finishing the crate, sorting the inventory, and reloading in the open. The crate is loud. Every squad in the area knows the moment the crate is opened. The fix is to loot the crate, move to cover, and sort the inventory in cover. The extra five seconds of movement are cheaper than the fight that would have been lost.
How supply drop loot changes your squad’s role
Different items from the supply drop change what the squad can do in the next fight. A sniper rifle in the crate lets one player take overwatch. An EMP lets the squad push a vehicle. A recon drone gives the squad information for 60 seconds. The right post-drop rotation depends on which of those the squad picked up.
Overwatch role after a sniper drop
If the crate gives the squad a sniper rifle, the right post-drop move is to send the new sniper to the nearest high ground and hold a sightline. The other two players continue the original rotation but stay inside the sniper’s coverage. This is the most common successful pattern after a spillway tower drop, where the sniper can hold the dam crest from above.
Push role after a utility drop
If the crate gives the squad an EMP or a recon drone, the right post-drop move is to push the nearest enemy squad while the utility is fresh. Utility items have a short shelf life: an EMP that sits in the inventory for three minutes is an EMP that did not earn its slot. Use utility within the next 30 seconds, or trade it to a teammate who will.
Sustain role after a healing drop
If the crate gives the squad a legendary healing item, the right post-drop move is to stop the rotation, top up to full health, and then continue. A squad that continues at half health will lose the next fight. A squad that takes 20 seconds to top up will win it. The healing item is more valuable than the time.
Late-game supply drop play
The late game changes every assumption about supply drops. The map is small, the zones are tight, and the drops are no longer optional. A late-game drop is a forced engagement: the squad that loots it has a decisive advantage in the final fight, and the squad that does not loot it has to fight uphill.
When the drop is inside the final zone
If the drop lands inside the final zone, the right play is to loot it as soon as the crate opens. The crate is visible, the beacon is loud, and every squad in the zone will rotate toward it. The first squad to loot it has a brief window of superiority before the second squad arrives. Use that window to take the high ground, not to sort the inventory.
When the drop is outside the final zone
If the drop lands outside the final zone, the right play is to deny it. Set up a sniper position on the edge of the zone, watch the crate, and shoot any player who tries to loot it. The crate will be swallowed by the zone in roughly 60 seconds, and any squad that loots it will have to push into the zone with no cover.
The final-circle drop
In the final circle, supply drops are rare but decisive. If a drop lands in the final circle, it is almost always worth contesting, because the loot is the difference between first and second place. The pattern is the same as the late-game drop, but the time pressure is higher: roughly 30 seconds to loot and reposition before the next zone closes.
How the developers balance the supply drop system
The supply drop system in Dam Battlegrounds sits inside the broader loot economy, and the developers adjust it based on player data. The two main knobs are drop frequency and drop risk.
Drop frequency
Drop frequency is the number of crates released per match. The default is one crate every 90 seconds, but the developers have experimented with one every 120 seconds in past test branches. A lower frequency makes each drop more valuable and each contest more intense. A higher frequency spreads loot across the map and reduces the third-party pressure on any single drop.
Drop risk
Drop risk is the average contest density around a crate. The developers adjust this by shifting the candidate pads toward safer or riskier zones. A patch that moves the dam crest drop to the lower turbine hall, for example, reduces the average contest density and gives safer squads a slight buff. A patch that moves the boathouse dock drop to the trailer park central loop does the opposite.
Reading the patch notes before queuing is worth the time. The developers usually mention the drop system when it changes, and the patch notes name any added or removed pads. Adjust rotation priorities to match the new candidate pool before committing to a memorized plan.
Practical drills to improve your supply drop game
Mechanical skill matters less than decision-making around supply drops, and decision-making is trainable. The following drills take 15 to 30 minutes each and produce measurable improvement within a few sessions.
Drill 1: drop map memorization
Open the in-game map and place a marker on every candidate pad across all three corridors. The goal is to be able to name the pad from the beacon alone, without looking at the map. Run the drill until it takes under 10 seconds per pad.
Drill 2: rotation timer
Pick a drop pad, drop into a match, and time the rotation from the starting position to the crate. The goal is to know how long it takes to reach each pad from a typical landing position. This is the most valuable drill in the guide, because the difference between making and missing a supply drop is usually a 10-second timing error.
Drill 3: role assignment practice
In a squad match, assign the looter, holder 1, and holder 2 roles before the crate lands. The holders do not move until the looter confirms the crate is safe. Run the drill for every drop in the match. The goal is to make role assignment automatic, so the squad does not have to think about it under pressure.
Drop frequency reference table
For players who want a quick lookup between matches, the table below summarizes the spawn cadence and the average contest pressure for each corridor on the public test branch. The numbers are observed averages from a sample of public-test matches, not promises from the developers; treat them as orientation, not gospel.
| Corridor | Avg. drops per match | Avg. time to first drop | Avg. contest pressure | Notes |
|---|---|---|---|---|
| Northern industrial | 1 to 2 | 3 to 4 minutes | High (2 to 3 squads per pad) | Drops favor squads with utility grenades and mid-range weapons |
| Central dam | 1 to 2 | 2 to 5 minutes | Extreme (3 or more squads per pad) | The dam crest is the single most contested pad on the map |
| Southern residential | 1 to 2 | 2 to 6 minutes | Medium (1 to 2 squads per pad) | Best corridor for solo players and for rebuilding squads |
Corridor pressure is not static. A match with three central drops back-to-back is rare, but it happens when the plane path rolls the same corridor three times in a row. In that case, the central pads become a meat grinder and the southern pads become the rotation target for any squad that wants free loot. Reading the plane path is the second-order skill that separates average drop chasers from disciplined ones.
Frequently asked questions
How many supply drops happen per match in Dam Battlegrounds?
On the public test branch, a typical match has between three and five supply drops, depending on match length. The first drop occurs roughly 90 seconds after the match starts, and subsequent drops follow the same 90-second interval. The final drop is usually the most contested because the map is small by the time it lands.
Do supply drops always follow the same corridors?
No. The plane selects one of three corridors per drop, and the corridor is randomized at the start of each drop. A match might have one northern drop, two central drops, and one southern drop in any order. Watch the plane at the start of every match to identify the first corridor.
Can a supply drop land in the water?
Yes. The lakeside boathouse dock is a candidate pad, and the crate can land in shallow water. A crate in the water is still lootable, but the player has to enter the water to open it, which makes them visible from the shore. The dock is the safest approach to a water drop because the boathouse provides cover.
What is the best weapon to bring to a supply drop contest?
Bring a mid-to-long-range weapon with a magnified optic. The most common engagement range around a drop is 50 to 150 meters, and a magnified optic lets a player identify and engage targets before they are identified in return. A close-range weapon is a liability at a drop contest because most fights happen at ranges where it is not effective.
Do supply drops despawn when the zone closes over them?
Yes. A supply drop inside the blue zone is destroyed when the zone finishes contracting. The destruction is silent; the crate simply disappears. This is why late-game drops outside the final zone are often not worth contesting: the zone destroys the crate before the squad can loot it.
Can you shoot the supply crate while it is descending?
No. The crate is invulnerable while descending on its parachute, and it lands with a brief invulnerability window to prevent spawn-camping exploits. Players near the crate can be damaged, but the crate itself cannot be damaged until it opens.
Is it ever worth contesting a supply drop as a solo player?
It depends on the pad. A solo player can safely contest a low-risk drop like the boathouse dock because the cover is dense and the third-party pressure is low. A solo player should not contest a high-risk drop like the dam crest because the third-party pressure is too high for a single player to survive. The medium-risk pads are judgment calls based on the current state of the match.
Do supply drops ever contain cosmetic items?
Yes, but rarely. Roughly one in ten crates contains a cosmetic crate token in addition to the standard loot. The token drops are not announced, so players have to open the crate to find out. Cosmetic drops are a side benefit, not a reason to contest a crate.
How do the developers decide which drop corridor to use?
The corridor is randomized at the start of each drop, with each of the three corridors having an equal chance of being selected. The randomization is not influenced by player position, match time, or zone state. The only exception is the final drop of the match, which has a higher chance of landing inside the final zone.
Are there any supply drop locations that the developers have removed?
Yes. The control house helipad was a candidate pad in an earlier test branch but was removed because the height advantage was too decisive. The developers publish the current candidate pads in the patch notes whenever a pad is added or removed, so check the notes before memorizing the map.
Putting it all together
Mastering dam battlegrounds supply drop locations is a system, not a checklist. The system has three parts: a memorized map of every candidate pad, a rotation logic that decides when to commit and when to ignore, and a contest pattern that keeps the squad alive while it loots. Players who build the system win more drops than they lose and convert that loot into late-game advantages other squads cannot match.
Start with the map. Memorize the ten pads above, then add the pads the developers add in future patches. Add the rotation checklist to the decision flow: zone, healing, sightline. Add the contest pattern to squad role assignment: looter, holder 1, holder 2. Run the drills for two or three sessions and the system will start to feel automatic.
The supply drop is the loudest moment in a match, but it does not have to be the riskiest. A disciplined squad treats the drop as a controlled play, not a gamble, and that is the difference between squads that win late and squads that feed kills in the early game.



Leave a Reply