

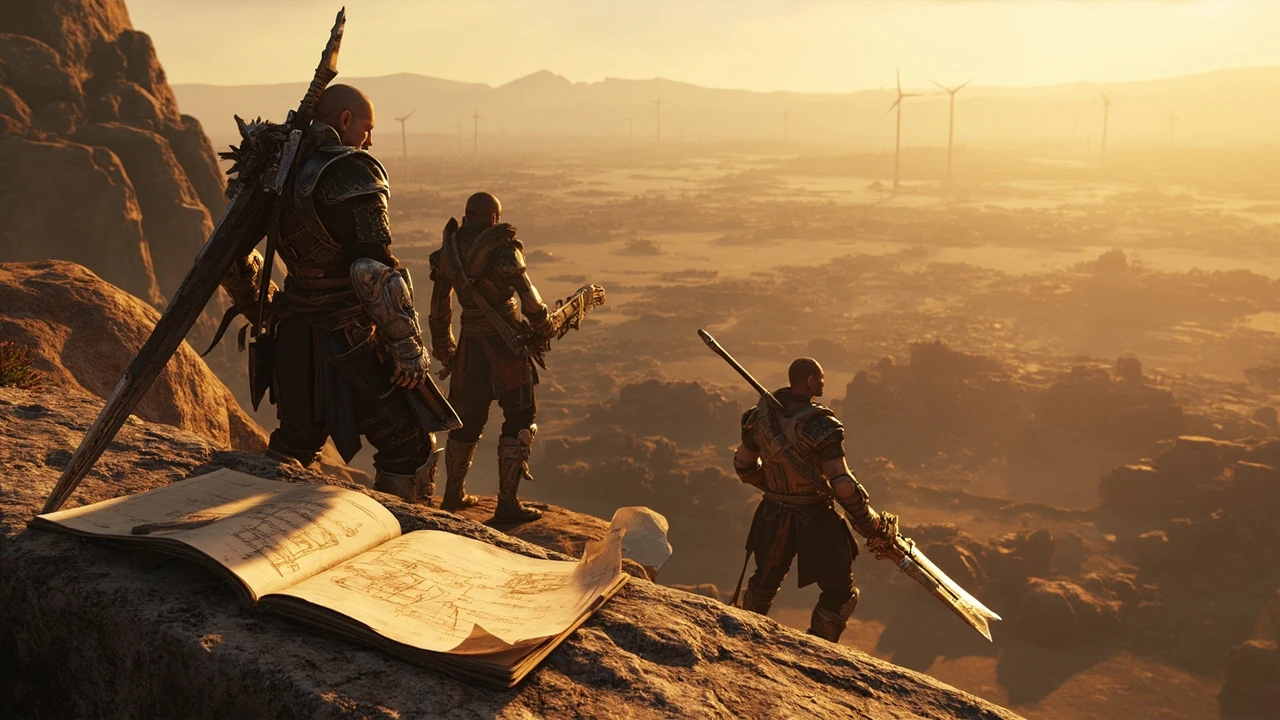
FF7 Rebirth walkthrough: how to approach a 40+ hour open-world RPG without losing momentum
Final Fantasy VII Rebirth is a large, branching role-playing game built around a fixed main story, dense open regions, and combat that rewards thinking about party composition as much as individual button presses. A useful ff7 rebirth walkthrough does more than list every chest in order; it gives a player a stable plan for chapter progression, a sense of when to swap characters, a way to read party synergy, and a feel for which side activities are worth the detour before the next story beat. This guide is written as a practical companion for a first playthrough on a standard PlayStation 5, with notes on difficulty, resource management, and the moments where the game expects you to make a build decision rather than grind.
Two structural facts frame every decision in Rebirth. First, the game is the second entry in a planned remake trilogy, so its pacing is built to be played across a long season rather than in a single sitting. Second, the move from the closed city of Midgar in the first entry to a region-based world map changes how optional content is distributed, which is why the walkthrough below leans on a region-by-region model instead of a strict linear checklist. The goal is to keep the player moving without forcing a particular route.
How the chapter structure shapes a first playthrough
Rebirth is divided into fourteen main chapters plus an epilogue, and each chapter is anchored to a major story beat that also opens or closes a region on the world map. Thinking in terms of region cycles rather than a flat chapter list helps you plan when to explore, when to push forward, and when to backtrack. The game signals region boundaries through fast-travel points, quest givers, and a world intel menu that lists activities, so the chapter list is also a checklist of optional tasks you can leave for later.
A useful mental model is to treat each chapter as three phases: an opening story segment that introduces the new region, a mid-chapter exploration window where the world opens up, and a closing set of forced story dungeons and boss fights. The mid-chapter window is where most of the optional content lives, and the game does not penalize you for leaving it unfinished when a story beat pulls you forward. You can return to earlier regions from the open world after finishing their chapter, which means the walkthrough is a guide, not a script.
Chapter 1 covers the reunion around Kalm and the early road trip exposition, which is short but dense with combat tutorials. Chapter 2 moves to Junon for the parade and infiltration sequence, and chapter 3 unlocks the Junon region as an open-world area with the first batch of Chadley combat simulators. Chapter 4 introduces the Gold Saucer and the Corel area, while chapter 5 returns to the field for the Mt. Corel climb and the beach resort side content. Chapters 6 and 7 cover the Gongaga region and the ruined reactor, with a focus on aerial combat and scouting mechanics. Chapters 8 and 9 take the party to Cosmo Canyon for narrative-heavy beats and the Gi cave observatory, including some mandatory Red XIII solo segments. Chapters 10 and 11 return to Nibelheim and Mt. Nibel, with heavy combat and a mandatory boss gauntlet. Chapter 12 is the long northern continent travel segment with tower puzzles and chocobo glide, chapter 13 is the Forgotten Capital dungeon, and chapter 14 is the final confrontation with no optional content remaining.
Chapter-by-chapter pacing at a glance
| Chapter | Primary region | Story role | Walkthrough focus |
|---|---|---|---|
| 1 | Eastern Continent, Kalm | Party reunion and exposition | Combat tutorial refresh, learn synergy basics |
| 2 | Junon area | Parade and infiltration | Stealth sections, parade mini-game, first synergy skills |
| 3 | Junon region | Open-world unlock | Chadley combat sims, world intel unlocks, first summons |
| 4 | Corel area | Gold Saucer introduction | Mini-games, theme park progression, party banter |
| 5 | Corel region | Mt. Corel and beach resort | Vertical traversal, beach resort side content |
| 6 | Gongaga | Ruined reactor and village | First region with heavy aerial combat, scouting mechanics |
| 7 | Gongaga region | Open-world expansion | Chocobo search, weapon upgrade resources |
| 8 | Cosmo Canyon | Red XIII’s home | Narrative-heavy chapter, optional lore, planetology tasks |
| 9 | Cosmo Canyon region | Gi cave and observatory | High vertical zone, Red XIII forced solo segments |
| 10 | Nibelheim | Cloud’s hometown and reactor | Heavy combat, mandatory boss gauntlet, party swap choices |
| 11 | Nibel region | Mt. Nibel climb | Climbing puzzles, elemental damage focus |
| 12 | Northern Continent | World map travel | Chocobo glide, tower puzzles, long travel segment |
| 13 | Forgotten Capital | Late-game dungeon | Multi-party fights, scripted losses, save before entry |
| 14 | Final confrontation | Climax | No optional content, full party, hard-mode prep recommended |
This table is a pacing map, not a strict order of operations. If a side quest pulls you into a region before its chapter officially opens, the game will simply route you back. Treat optional content as a parallel track you can run in the same play session or across several, and use save rooms as natural waypoints when you want to change direction.
Building a party that survives standard and hard mode
Combat in Rebirth is built on three layers: real-time action with a single character you control, ATB charges that unlock abilities and spells, and synergy skills and abilities that link two party members. The walkthrough benefits from a party that covers three roles: a primary damage dealer who can pressure enemies, a support who can heal or raise, and a flex slot for elemental coverage or stagger extension. The game lets you swap party members at benches, save rooms, and many rest points, so your build is not a one-time decision.
On a first playthrough, a stable default party is Cloud, Aerith, and Barret. Cloud handles stagger and sustained damage, Aerith provides the strongest raw healing and a steady ranged tempo, and Barret offers a tanky stagger extender with strong area damage. This setup is forgiving, scales well into the late game, and does not depend on any specific side-quest reward. Players who prefer a more aggressive tempo can swap Barret for Tifa, accepting less ranged pressure in exchange for faster stagger windows and stronger melee combos. Tifa’s role as a close-range pressure fighter is most useful in chapter 6 onward, when the game introduces more enemies that resist ranged chip damage.
For players who want to see every character in action, the recommended approach is to rotate the third slot across chapters. Aerith works best when you anticipate multi-phase bosses, Barret is the safer pick in regions with heavy aerial combat, Tifa shines in tight corridors and against single targets with high break damage, and Yuffie is the strongest choice once her full Folio is unlocked around chapter 9. Red XIII’s value spikes during Cosmo Canyon and any fight that punishes close-range aggression, while Cait Sith is a late-game unlock that rewards players who have invested in the summon and synergy paths rather than raw damage. The key idea is that a party is a tool you adjust per chapter, not a fixed identity you commit to at the start.
Synergy skill and ability checklist for the first half
- Cloud and Aerith: use a synergy skill to extend a stagger window while Aerith keeps a regen on the active character.
- Cloud and Barret: pair an overhead sword swing with a ranged suppressive fire volley to keep aerial pressure on a boss.
- Aerith and Tifa: a quick ranged-then-close burst that works well when you want to burn a stunned enemy before it recovers.
- Barret and Tifa: a close-range pressure combo useful against heavily armored targets that resist magic.
- Red XIII and Yuffie: a later-game pairing that combines Vortex (Yuffie) with the Sentinel stance to keep the team safe during scripted boss phases.
Synergy actions cost one ATB segment per partner, so do not burn them at the start of a fight. Wait for a stagger or a clearly telegraphed boss phase before chaining them. That timing rule is the single most important piece of combat advice in this walkthrough and it remains correct on hard mode, where a wasted synergy in the opening seconds often decides the entire attempt.
Resource planning: gil, SP, and upgrade materials
Rebirth is generous with money but tight on upgrade materials. Each weapon has a skill tree that consumes SP gained by using the weapon, and each character has a separate Folio that costs specific tokens for shared abilities. The walkthrough’s resource rule is simple: spend SP and Folio points as you earn them, do not hoard them, and avoid spending hard-currency resources on weapons you will replace within two chapters.
| Resource | How it is earned | Where it matters most | Walkthrough tip |
|---|---|---|---|
| Gil | Combat, side quests, vendor sales | Potions, gear, inn restocks | Sell duplicate crafting components in batches of 10 to avoid menu fatigue. |
| SP | Using a weapon in combat | Weapon skill tree | Equip a weapon you plan to keep as soon as it becomes available, then lean on it for two chapters. |
| Folios | Region activities, combat sims | Shared abilities and stat boosts | Save tokens for one or two core abilities per character; avoid spreading points across many nodes. |
| Ore and crafting parts | Chocobo stops, mining, combat drops | Weapon upgrades at the bench | Upgrade the active weapon before the next major boss, not the one in storage. |
| Mythril and rare drops | Late-region chests, sim rewards | Final weapon tiers | Plan one late-game weapon for each character; do not split rare resources across all nine. |
Before going deeper, two things are worth stating clearly. First, Rebirth is the second entry in a planned trilogy and was released exclusively on PlayStation 5; the project is documented in detail on the Final Fantasy VII Rebirth Wikipedia entry, which tracks its director, structure, and place inside the remake project. Second, the game’s design intent was confirmed during the original sequel reveal and PlayStation 5 launch coverage from The Verge, which emphasized the shift from the linear Midgar setting of the first game to a much larger, region-based world. With those two reference points in mind, the rest of this article focuses on how to actually move through the game with confidence.
The cheapest mistake players make in a long RPG like this is to fully upgrade a weapon they will outgrow. A good walkthrough keeps you pointed at the next meaningful upgrade and leaves the rest of the bench alone. The same logic applies to Folio nodes: the strongest passives in the back half of the game are the ones that change how the party plays rather than the ones that add a small percentage of damage to a single ability.
One more resource deserves its own note: the crafting components sold by vendors in each region. They are not expensive individually, but they accumulate quickly, and most players either ignore them entirely or buy more than they need. The walkthrough recommendation is to buy the small stack of ore and leather available from the first vendor you find in each new region, ignore the rest until the chapter’s main dungeon, and then return to the vendor right after the boss fight if you have spare gil. That rhythm keeps the inventory small and makes the upgrade bench feel responsive instead of buried.
When to explore, when to push the main story
Rebirth is built to reward exploration without punishing you for ignoring it. Every region has a “world intel” list that tracks activities such as activatable towers, procurers’ lifespans on the map, combat simulators run by Chadley, and discovery points. These are not missable, but they are tied to the current region, which is why the walkthrough recommends finishing region tasks before moving on to the next chapter’s open-world window. The game does not lock you out of earlier regions, but the relative reward of earlier content drops as you level up.
Exploration priority list for a balanced first run
- Activate the region’s tower or fast-travel unlock to reveal the map and shorten travel time.
- Clear Chadley’s combat simulator challenges for the current region, which unlock new materia and Folio tokens.
- Pick up one or two procurers or side-quest chains per region for story flavor, not for completionist chasing.
- Visit the weapon bench and spend any saved SP on the active weapon before the next story boss.
- Return to the open world only after the chapter’s main dungeon and boss to mop up remaining activities.
This order keeps the world from feeling overwhelming and lines up your strongest resources with the next major fight. If you prefer a more linear style, simply replace steps 2 to 4 with the minimum level needed to feel comfortable in the next dungeon, which is usually two to four levels below the region’s suggested range. The game also has a fast-travel cost that scales with distance, so spending time on a tower early in a region pays off in travel time across the rest of the chapter.
Side quests in Rebirth fall into a few practical categories. Story-flavored quests are short, usually two or three objectives, and they tend to introduce a region mechanic or a non-player character who matters later. Procurement quests are the longer, map-driven tasks that ask you to gather specific items or hunt specific monsters within a timer. Mini-game chains are region-locked and often gate rewards that are not strictly necessary but useful. The walkthrough’s view is that story-flavored quests are worth doing as you find them, procurement quests are worth doing in batches when you have the relevant tools unlocked, and mini-game chains are worth doing only if you enjoy them, because their rewards can be bought or earned elsewhere.
Combat encounters and boss prep that the walkthrough flags
A walkthrough is most useful at fights where preparation matters more than reflexes. The following list is not a leak of specific build answers, but it does call out the encounters that are commonly cited as the major difficulty spikes of a first playthrough. Treat each as a checkpoint where you should save, review your gear, and confirm your party.
- Mid-chapter Junon parade segment: a stealth section with limited combat that punishes players who skip the tutorial prompts.
- Corel mine dungeon: a vertical area with multiple boss-tier enemies in a short loop, demanding ATB discipline.
- Gold Saucer attractions: a series of mini-games that gate story progress; time spent here is mandatory and the difficulty of the attractions scales with story progress, not with your combat level.
- Gongaga ruins: heavy aerial combat and a boss with strong magic resistance that rewards physical burst comps.
- Cosmo Canyon observatory: a long climb with scripted Yuffie solo combat that punishes over-reliance on Cloud.
- Nibel reactor: a multi-boss gauntlet at the end of chapter 10; the save point before entry is intentional and you should use it.
- Northern continent tower gauntlet: a long exploration section that drains resources, so plan a restock before departure.
- Forgotten Capital: a late-game dungeon with mandatory scripted losses and multi-party fights, the most common point where a walkthrough gets reread.
For each of these, the practical advice is the same: review your ATB cooldowns, make sure you have at least one ranged option, and avoid spending curative items on trash mobs so that you enter the boss room with full resources. A useful habit is to spend a minute at every save room scanning the upcoming dungeon for environmental cues. The game tends to telegraph boss phases with arena changes, background music shifts, or scripted dialogue, and reading those cues before the fight starts saves more time than any build tweak.
How difficulty modes change the walkthrough
Rebirth ships with a standard mode aimed at the average player, a hard mode available from the start of a fresh file, and a dynamic mode that scales enemy level to your current average. The walkthrough above assumes standard or dynamic at default settings. If you begin on hard mode, two adjustments matter:
- Stagger windows are shorter and damage taken is higher, which makes defensive synergy abilities like Counterstance and Sorcerous Storm more valuable than raw offense.
- Save before every boss and treat the save room as a soft checkpoint. Hard mode bosses do not always give you a chance to regroup mid-fight, so the next attempt is the one that has to land.
Dynamic mode is a middle path. Enemies scale to roughly your party’s level, so the walkthrough’s “explore first, push the story second” advice still applies, but the cost of falling behind the recommended level is lower than on hard mode. If you are playing on standard, the walkthrough is a guideline; on hard, treat it as a checklist. The game also lets you change difficulty from the system menu at almost any rest point, which makes it practical to start on hard mode, drop to standard for a single encounter, and return to hard once you understand the fight. That flexibility is part of the reason a walkthrough should not assume one fixed mode for the entire run.
Common pitfalls in a first playthrough
Even players who enjoy open-world RPGs tend to make the same handful of mistakes on a first run. Calling them out up front lets the rest of the walkthrough stay focused on the game itself.
- Spending crafting materials on cosmetic gear. Rebirth’s transmog system lets you keep the look of an upgraded weapon, so upgrading the strongest option is almost always correct.
- Skipping the weapon tutorial. Each weapon has a unique skill that unlocks a synergy ability, and the game does not always prompt you to use it.
- Hoarding Phoenix Downs. Late-game dungeons include scripted losses that revive the party automatically, so saving items for those moments is a common source of frustration.
- Ignoring the Folio menu. The Folio is the only place where shared abilities like First Strike and Auto-Cure are unlocked, and these passives are the real power curve in the back half of the game.
- Leaving a region before activating its tower. The tower is the unlock that turns the map from a fogged outline into a usable navigation tool, and the game does not warn you that the best exploration comes after the tower is online.
Two more pitfalls belong on this list even though they appear less often in community discussions. The first is over-relying on a single character during the first chapter, which leads to a party that is unevenly leveled by the time the game expects you to swap in story-mandated segments. The second is ignoring the in-game chapter recap before the Forgotten Capital. The recap is a few screens of text, but it stitches together several plot threads that the script assumes the player remembers, and skipping it is the most common cause of confusion during the late-game set-pieces.
Avoiding these issues will not turn a walkthrough into a speedrun, but it does remove a lot of the friction that pushes players to look up external guides mid-game.
How the walkthrough supports different play styles
Not every player wants the same thing from a 40+ hour RPG. The table below maps three common play styles to specific walkthrough recommendations so the guide remains useful regardless of how you actually play.
| Play style | Walkthrough priority | Optional content approach | Suggested party focus |
|---|---|---|---|
| Story first | Main chapters and lore-heavy side quests | Skip mini-games, sample one per region | Cloud, Aerith, Red XIII for narrative beats |
| Completionist | World intel, procurers, combat sims | Clear each region before moving on | Cloud, Barret, Tifa for coverage |
| Combat focused | Hard mode, synergy optimization | Focus on combat sims and boss refights | Cloud, Tifa, Yuffie for stagger loops |
If you change play style mid-run, that is fine. The walkthrough’s job is to surface the trade-offs so you can decide on the fly rather than commit to one path. A common pattern in long RPGs is to begin as a story-first player, hit a wall in chapter 10, and switch to a combat-focused mindset for the late game. The walkthrough supports that shift by flagging which chapters reward which play style, and by marking the save rooms where a difficulty change is most practical.
Pre-finale checklist before the last dungeon
Because the late game in Rebirth is long, multi-party, and unforgiving on resources, a pre-finale checklist is one of the most practical sections a walkthrough can offer. The list below is a minimum, not a maximum, and applies on any difficulty.
- Confirm that each active weapon has been upgraded at least once with a regional rare material.
- Stock at least twenty potions, ten phoenix downs, and one of each elemental cure for the active party.
- Review the Folio and unlock at least one passive per character that you have not used yet, in case the late game demands a different play style.
- Save the game in a separate slot, then again in a manual save inside the final dungeon entry room.
- Read the in-game chapter recap for the last three chapters. The script assumes you remember the set-pieces, and the recap is the only place where several plot threads are summarized.
None of these steps take more than a few minutes, and they make the difference between a clean run and a frustrating reset. A related habit is to spend the last hour of open-world exploration on procurement rather than discovery: rare materials found in the final region’s chests are the only ones that will actually be used by the weapons you keep, and discovery points that award cosmetic items can be safely skipped if time is tight.
What the walkthrough does not cover, and why
Two things are deliberately left out of this ff7 rebirth walkthrough. The first is the full quest log for every side quest in the game. Rebirth has more than 300 optional activities across its regions, and listing them all would turn the article into a database dump rather than a guide. The second is anything that resembles spoiler-heavy plot resolution. A walkthrough is most useful when it prepares you for the moment, and the moment itself is the reward.
What the walkthrough does cover is the structure of a first run, the resource decisions that compound across 40+ hours, the boss prep that is consistently underestimated, and the small set of habits that keep the open world from feeling like busywork. Treat it as a map of the game rather than a transcript, and you will get the most out of both the main story and the side content. If a specific section feels thin, that is usually a sign that the underlying game mechanic is best learned by playing it rather than reading about it, which is part of why the walkthrough stays at the level of guidance instead of prescriptions.
Frequently asked questions
How long is a typical ff7 rebirth walkthrough in hours?
A focused first playthrough that follows the main story and samples side content runs between 35 and 45 hours. A completionist run that clears every region, combat sim, and side quest usually falls between 70 and 90 hours. Hard mode adds a small overhead because of more frequent retries but does not change the total content significantly.
Do I need to play Final Fantasy VII Remake before Rebirth?
Rebirth is a direct continuation of Remake’s story and assumes you know the party, the antagonists, and several plot twists from the first game. You can technically start with Rebirth, but the narrative is more satisfying if you play Remake first. Save data from Remake also unlocks a small number of cosmetic items and a few balance tweaks.
Which party should I use for the ff7 rebirth walkthrough on hard mode?
On hard mode, the most stable default is Cloud, Aerith, and Barret. Cloud’s stagger pressure, Aerith’s healing and ranged tempo, and Barret’s stagger extension cover most encounters. If you prefer a faster stagger loop, swap Barret for Tifa once you have her Folio passives unlocked.
Are missable items really missable in Rebirth?
Almost no quest rewards are permanently missable. Most regions remain accessible after their chapter ends, and the world intel menu tracks which activities you have completed. The few items that are time-gated, such as certain quest rewards tied to a specific story beat, are flagged by the quest log itself.
What is the best way to grind SP for the weapon skill tree?
Use the weapon you want to upgrade as your primary during normal combat, and run the region’s combat simulator challenges. Chadley’s sims are tuned to give a reliable amount of SP per run and unlock Folio tokens at the same time, which makes them the most efficient use of a play session.
Should I do side quests before or after each chapter’s main dungeon?
Doing region side content before the chapter’s main dungeon gives you the strongest resource window for the boss. Doing it after lets you enjoy the story at a relaxed pace but means you return to earlier regions as a higher-level character. Both are valid; the choice is about pacing, not about missing content.
How does dynamic difficulty compare to standard mode in the ff7 rebirth walkthrough?
Dynamic mode scales enemy level to your current average, which keeps exploration feeling relevant but removes the sense of a level curve. Standard mode gives a clear sense of progression and is generally recommended for a first playthrough because the difficulty spikes are intentional design.
Can I change difficulty mid-run in Rebirth?
Yes, difficulty can be changed from the system menu at almost any rest point. The game warns you that lowering the difficulty mid-fight is not allowed, but you can adjust between chapters or even between dungeons. This makes it practical to start on hard mode and drop to standard if a specific encounter blocks you.
Do chocobos matter for the walkthrough or are they cosmetic?
Chocobos matter. They are the fastest way to cross the open world, can glide and climb in specific regions, and are required for several procurers. Skipping them makes the game feel longer without making it harder.
Is the ff7 rebirth walkthrough different on a second playthrough?
On a second playthrough, the walkthrough shifts toward combat optimization, optional boss refights, and the new game plus systems if you start fresh. The chapter order does not change, but the resource priorities do: you spend earlier and more aggressively on the second run because you already know which weapons you will keep.





Leave a Reply